TRANSFER - On pottery.
 Transfer literally means to pass something from one place to another. A transfer in ceramics is a design copied industrially to be reproduced many times. They are printed on specially prepared paper to form a film that can be transferred onto another surface, they can be bought prepared or you can have a design made.
When prepared they are on top of a white piece of paper and covered by tissue paper to protect it. The work needs 3 firings 1) Clay to bisque, 2) The bisque fired with an opaque glaze-base, 3) The transfers onto the fired base. They are made for cups, plates, tiles, etc. and the transfers are fired at between 700º and 800º C.
When not being used, do not leave them piled up on top of each other as the weight can make them stick together. Keep the large pages packed as they came, in a strong, thin, cardboard box that can stand on its side. To keep transfers that have been separated from the tissue paper and will not be used for a long time, it is necessary to apply a little talcum powder over the front side, this stops them from sticking to each other so they can be used whenever needed.
1) The size of the tile is 7.5 × 7.5 cm and it has been fired with a white opaque glaze-base.
2) Clean it with a soft, slightly dampened cloth, this makes it more adhesive and helps to hold the transfer in place.
3) There is a space between each transfer so they can be cutout. Cutout the transfers that are going to be used and remove the tissue paper.
4) Have a small, shallow bowl of clean water and put into it two or three cut-out transfers. Let them soak in it for a few seconds; they will roll up as the water filters down between the transfer and the paper. This starts to separate them, they will flatten out again.
5) Lift one out of the water, holding it by the two top corners and push the transfer up, so it slightly overlaps the white paper.
6) Lay the part of the transfer that is separated onto the tile, so the top two corners of the transfer are placed correctly.
7) Hold them down and pull out the paper from underneath the transfer.
8) Once the paper is removed, if needed correct the layout of the transfer, moving it smoothly.
9) With a soft kidney, spatula or simply a soft rubber, push out all the water that is still in between the transfer and the tile, pass the rubber tool over it, moving the dampness to the borders and off.
10) The last thing to do before finishing is to pass a cotton cloth over it in the direction of the corners to remove any last drops of water left. Any water left between the transfer and the tile can leave a damaged surface after being fired.
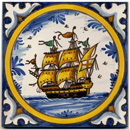
Notes: The first illustration is the handpainted tile 15×15 cm, which was decorated especially for making the transfer. The following photos are taken on top of a light brown canvas to give contrast to the white and transparent paper of the transfers. The photos are in the order of working, each has a short explanation.
Click on the image to enlarge it
 The original tile 15x15 cm.")
 The original tile next to one of 7,5 x 7,5 cm.")
 The transfer with tissue paper cutout.")
 The tissue paper folded back to show the real colors.")
 The tile and the transfer prepared to use.")
 The transfer in the water.")
 The transfer in the water, curling.")
 The transfer separated to show the transparent part.")
 The transfer is placed on the tile and the paper is being pulled out from underneath, at the top is the tile.")
 Pulling the paper out that is between the tile and the transfer.")
 Moving the transfer to place it correctly.")
 Two special kidneys for working with transfers.")
 With a kidney eliminating bubbles of water and air.")
 The preparation of the transfer finished.")
 A close up of a page of transfers.")
 How to keep large pages of transfers.")
 A box to keep cutout transfers.")
