FILING (2) Pottery drawings by subject and size.
ca: ARXIVANT (2) ceràmics dibuixos per tema i mides.
es: ARCHIVANDO (2) cerámica dibujos por tema y tamaño.
 Filing drawings and photos in pottery is a tiring, boring and complicated job. It is something one doesn’t want to do, but has to. Designs can be used again and again, copied, made smaller, bigger and changed; having them saves time, so you must know what you have got and where they are!
If possible keep a photo of every new, fired, pottery design and file them in your computer, with photo, name, number, size, year, client and any other information you have, such as; if you have a drawing pounced, what type of paper it is prepared on, etc. The filing of designs for plates and jars is basically the same as tiles except the designs are smaller and all fit into the file-boxes.
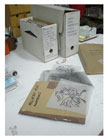
Separate the designs by object, subject and size.( Illustration a – c)
Keep each type and size in separate folders and in separate file boxes and mark both folders and boxes on the outside with the names of what is in them. These boxes are for designs of one or two tiles, plate centers, plate borders, jars and lids. They are all filed first by subject, then by size.
Filed and classified drawings of plates, jars and lids are kept separately; plates have two files, one for the centers and one for the borders. The centers and the borders are filed separately and can be used one with another. Photos are particularly important when filing borders, as recognizing the drawing is difficult since the designs have no subject. The centers are filed under subjects; birds, hunters etc., as designs are pounced on transparent paper to, recognize them is very difficult, even if they are classified by object and size. There might be up to 50 different designs all with the same subject e.g. flowers. It is particularly hard for people who have just started to work and do not know the designs, which is why to file them in your computer is important, making it easy to run through a large selection of photos quickly and to choose a design.
Filing lage tile designs. (Illustrations d – e)
The first photo shows a table with large thin drawers, which are ideal for keeping the drawings flat. They are for designs of more than 2 tiles and each subject is kept in a folder made up of brown paper to the size required. For drawings of Saints I have 6 folders, one for designs of 6 tiles, one for twelve tiles and one for bigger and odd sizes, each category has two folders, feminine and masculine. On the front of the folder, a printed list is attached with the names of the Saints in alphabetical order plus their coding numbers for the computer, where there is a colored photo and all the information needed.
Filling very large tile designs (Illustration f)
Use a drawer on wheels. After a few years, one’s studio becomes so full that you have to find practical ways for storing and filing your drawings. The following is one which makes use of unused space and is easy to pull out when looking for designs or for cleaning the floor. Wherever you have shelves or tables, leave a space between the first shelf and the floor and make a box with wheels that fits into it. I found two of these drawers in the road ready to be thrown away. They were made to go under a bed but I put one under the large table I use for drawing and packing. The box is square, 100×100 cm and 25 cm high. Some of the drawings are so big that they have to be folded two or three times.
You should have a thin piece of wood, in the big drawer that goes inside the box from wall to wall, lying on top of the drawings. This helps to keep the drawings flat and clean. Cut out a half circle on one side of the wood, just big enough to slip your hand into it when picking it up and put a handle on the front of the drawer to make pulling it in and out easier. This is shown in the last photo in the second group.
Filing has changed (Illustration g – h)
Since the changes of digital photos, scanning and printing started it makes work quicker, cheaper and you can do it yourself, I now do a large design on a small scale and then have it photocopied to the correct size on to transparent paper, up to 6 tiles in size. This is much better as you can keep all the sections of one design together and flat. The photo is of a design of 30 tiles and shows how they have been separated.
The next section; File – Filing (3) pottery jar designs


