ca:
ESMALT-BASE (f) Neteja de rajoles
es:
ESMALTE-BASE (f) Limpieza de azulejos
Cleaning tiles
When the glaze-base is dry enough to clean, you can stack the tiles in pairs, face-to-face and then back-to-back. If they are not dry enough, they will stick together and be unusable when separated. Place about ten pairs in a stack and then begin to clean the edges and backs of the tiles. The less you touch the glaze-base, the better. Your hands are naturally oily, and oil is incompatible with the glaze. As you work, move the tiles from one side of the table to the other. Start the cleaning process with the tiles stacked on your right. When the sides have been cleaned, move the tiles to your left and when the backs have been cleaned, on your right, then when dusted and finished back to your left.
Remember: All the glaze-base taken off can be cleaned and used again
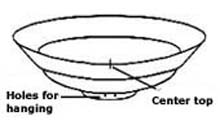
To clean off the glaze-base you must have several scrubbing brushes with natural bristles and wooden frames. The more you use them, the more the bristles wear out, the stronger they become and the better they work, so keep them at varying stages of wear. The worn out ones are good to clean the back of tiles, on which there is a lot of thick glaze. This is a difficult part to clean because the tiles are manufactured with protruding designs or trademarks which collect and hold the glaze-base. To finish the cleaning, use a brush with long hair, to take off the last of the white dust.

Working Method
a) Cover a table with a large piece of plastic Have several wide bars of wood on each side to put the tiles on during the stages of cleaning.
b) Put pairs of tiles, with glazed sides facing each other, in stacks of about ten on your right, on top of the wooden bars.
c) Clean the tile edges, then move them to the left.
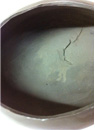
d) Have a small rigid container, about 13cm high to put the tiles on when brushing the backs. Clean the backs move to the right.
e) Dust and repair, move to the left.
Cleaning the sides.
When one side is done, turn the pile and clean the next side, until all four sides have been cleaned. The three ways outlined below to clean the tile edges are in my order of preference.
Note: With the first two methods, when you lift and turn the tiles around, to clean the sides, clean off the glaze that has fallen onto the board you are working on, so it cannot dirty the parts that are already clean. Loose glaze can be forced up between the tiles and damage the glaze-base.
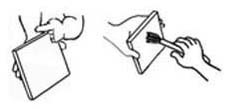
 Cleaning with your fingers.
Hold several pairs of tiles sideways on top of a bar of wood and run your index finger along the edges, lengthwise, to push off the glaze, turn and clean all four sides. In the past, old leather gloves were used for this. The last three fingers and thumb were cut off the glove; then, the first finger and the rest of the glove were used as protection. To do this use a plastic glove but if you find it awkward to work with, just cut off one glove finger and use it to cover your first finger.
 Cleaning with a scraper.
Holding several pairs of tiles, edges up, on top of a bar, use a plastic scraper to scrape the glaze-base from the edges, moving it lengthwise.
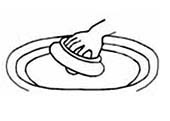
 Cleaning with a brush.
Strong brushes are needed and before starting to clean the edges, make sure the sides of the tiles are even. To check this, hold several pairs of tiles together tightly and stand them on their sides or pile them on top of the rigid container, where they are going to be cleaned. Then hold the flat back of your brush against one side and with your hand on the other side, flatten them out.
Hold them down with one hand and, with the other hand, use the end of the back of the brush, to scrape off the glaze, moving lengthwise along the sides of the tiles.
Then, brush the sides using a downward movement until they are clean.
Remember, when brushing the sides; always brush down the edges, not lengthwise, because the bristles ban go between the tiles, scratch and damage the glaze
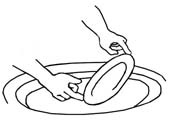
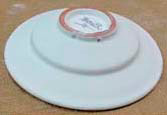
 Cleaning the backs.
Once all the sides are cleaned, clean the backs. Pick up the pairs of tiles and put them on top of the container. With your most worn-out brush, which is the strongest, clean the backs of tiles, brushing the glaze off and outwards, the cleaner the better. Turn the tiles so the edge of each side is brushed outwards. Make sure that the edge of the underneath tile does not protrude, as the bristles could overlap and damage its glaze-base. If they are not clean enough, brush them again with a longer-haired brush, then pile them up on top of a clean bar of wood.
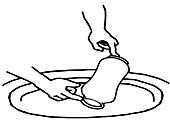
 Finishing the cleaning.
Pick up the tiles, one by one, holding them by the edges. Slant the tiles downward and tap on the top edge to knock off any loose glaze. If there is still some left, clean it off with a large, soft, dry brush. Gently rub any small holes with your finger. If a tile is badly damaged, put it aside so you can later repair all the damaged ones together. Lay the finished ones out on the shelves to dry.
Warning: Industrial tiles used to be very good to use but the manufacturing methods have changed and with this many new problems have appeared, most of them during the process of the glaze-base drying. They are now made lighter, thinner and stronger and something in them reacts against the glaze-base. Before, when the base was put on and cleaned, you could stack them one on top of the other, face-to-face and leave them for months. Now you can not do this as the glaze-base forms a rash, which is like hundreds of very hard, fine bits of sand and makes them unusable. Now you must lay them out, individually, on their backs to dry. There is a photo in the dictionary showing our corridor, with many movable shelves, full of tiles left to dry. When dry, after two or three days they can be piled up face to face.
Note: The cause of this problem is that modern bisque is so strong, when the tiles are stacked, that the glaze retains its dampness as it cannot escape. For certain clients we buy handmade or semi handmade tiles and these do not react in this way, but they are thicker and this makes everything more expensive, so we only use them when they are especially requested and the client is willing to accept the price. Here I have not explained these problems and their remedies as I am assuming and hope the readers can still buy good quality tiles.
Read more about: Tile – Problems
To see the next video; Glaze-base (f) video – Stage 2 Tiles: Putting on the glaze-base.
 Gallery: Gallery is the part of a jar that protrudes on the inside of the neck and serves to hold the lid.
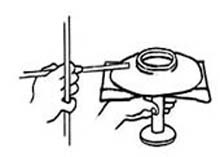
  Gauge post is used for two purposes; to gauge lines round pots as decoration and to check that the different widths of a pot are correct all the way round. It is a pole which supports one or more arms and with a floor at the bottom that can be attached to a table.
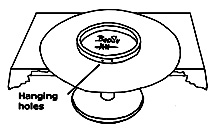
  The Giffin Grip is a tool made to be attached to a potter’s wheel. It is designed to hold plates and jar, when they are leather hard, upside down and correctly centered, while being turned. It holds the pieces in place while trimming the footings and it makes the work faster and easier. It is used for the same purposes as a chuck and comes in two pieces, a spiral plate which is a wheel bat, and a top plate which holds what is being turned.
  Note: Before starting to apply the base the bisque must be cleaned and sounded, this is explained in the follow four sections. Read more about:
 Glaze-base thickness.
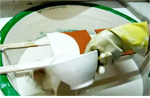

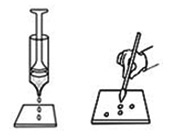 Dripping: You can use anything from a bag for icing cakes, an injection syringe or a large soft brush. You literally drip the base or paint onto the object you are decorating. Different colors should not touch each other, unless it is part of the planned design that they should mix. Dripping can be done on to dry clay with slip, with colors over a glaze-base or colors directly on to bisque to fill spaces and leave textures.
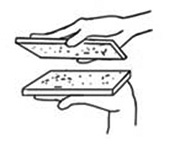 Sandwiching: Prepare two tiles with a color or glaze-base and straight away, while they are still damp, join them face-to-face. When separated they will have a rough texture. The quicker this is done and the damper it is, the rougher the texture will be. Leave to dry and then clean backs and edges.
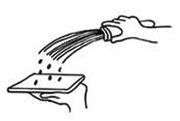 Spattering: to make an uneven texture by using glaze-base that has become sedimentary and the water has separated from it. Before stirring it, take a small basin full of thick base and put it to one side. Then stir what is in the container, adding water to make a very thin substance. Prepare your tiles with this glaze-base and leave to dry. Next, either holding the tiles in your hand or laying them on the woods over the basin, dip a “brush of palm leaves,” or something similar, into the bowl with the thick glaze-base and shake it over the prepared tiles.
  The next five designs have had the glaze-base shaken on to them, as previously explained. The photos are to show different effects made by applying colors, in different ways, on to textures.
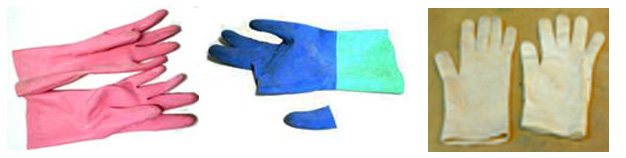
 Do not prepare this glue until needed, it dries very quickly and then it has to be thrown away.
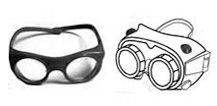 Goggles should be designed so that they are sealed tightly to your face to exclude airborne dust and liquid from touching your eyes. They can be purchased with anti-mist lenses and dark lenses for viewing the bright light of a hot, open kiln. Buy cheap goggles also to wear when cutting tiles and be very careful when cutting glazed tiles as sharp bits fly off and this is dangerous. There are many types and they are also classified in catalogs under shields, masks.
 Green is a very important color in the Majolica method and green copper oxide is one of the main ones used. You can mix and make up colors to your own taste. The following, going from right to left, are the four I use in the Majolica method.
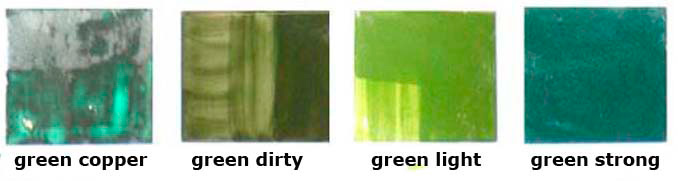
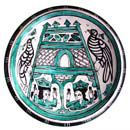 Green Copper: The plates below are copied from a photo; the original is in the Ceramic Museum of Barcelona. It was originally painted after 1400 AD in Paterna, a town in Valencia. When this style started it was known as Bicolor as it uses two colors only, manganese and copper green. There is also Tricolor which uses three colors; the most common colors for this method are green and blue.
 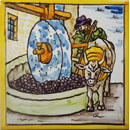 Grinder is a machine that has functioned through history by hand, horse, water, wind and electricity. It is used to break down hard products into particles. In the past they were made in two parts, the floor that was flat and static to hold the product and the grinding stone, the upper piece that was turned so it rolled and crushed what was between them.