Ceramic - Pottery Dictionary

by Susan Mussi

ca: CARREGAR (a) Forns

es: CARGAR (a) Hornos

Packing kilns: Firing is one of the big expenses in ceramics and it’s important not to waste space or time. Kilns can be rectangular, round, octagonal, square or oval and they either open from the top or at the front. Large industrial ones are very well designed, they are square or rectangular and the inside is a trolley on wheels that can be packed outside the kiln. This allows you to work on all four sides and mount the floors one by one. When completely packed it is pushed back into the kiln.

All kilns have their good and bad points and you have to consider the shape and size you buy in relation to what you work with. Kilns that open at the top have some advantages; you can see the whole floor from above, which allows you to arrange and change the layout and check that the decorated pieces do not touch.

Kiln furniture is very important, there are many different pieces. You need enough to build and fill up your kilns well and quickly. The furniture you buy can be customized to special sizes. With an electric drill, as explained in the section tile – cutter electric, you can cut and file furniture and industrially made bisque tiles, they are cheap and can be cut down to make shelves to the sizes you need.

It is good to have your work separated by kiln shelves. This helps to limit the damage that can occur, should a piece explode or colors run. Such an accident can cause the scattering of bits of clay, which can break, to damage the kiln and all the work inside it.

If your kiln uses cones, make sure they are not touching anything.
Read more about: Kiln – Furniture

ca: CARREGAR (b) Argila per la cocción de bescuit

es: CARGAR (b) Arcilla para cocción de bizcocho

Packing clay: before starting make sure the kiln is clean, none of the furniture is broken or has glaze from a previous fired.
Always check to what temperature the clay you are using can and should be fired to. Over-firing clay can turn it into a liquid and destroy your kiln. Clay shrinks during firing. If you fire clay to its correct temperature, shrinking will stop, but if you under-fire it, shrinking will continue when it is re-fired. There are two ways of firing and each one has different methods.

a) The clay is fired to become bisque.
b) The clay and the decorating are fired together.

When packing clay, it does not matter if the pieces touch as they never stick to each other. Plates and lids can be piled up, bowls boxed, one upside down on top of the other and a lid can be on the article it was made for. When packing objects that are thick and heavy like tiles, leave a space between pieces to ensure that the strong gases escape during the first hours of firing, this helps the temperature to spread evenly throughout all parts of the kiln and around the ware. The effects of uneven heating and cooling are the main causes of cracking, warping and breaking and this is particularly important if the clay is thick.

Tiles are thought of as easy to make as their shape is so simple but firing them is difficult. One of the main problems is that they are large, fat and thick and if the heat differs in places it can cause warping and breaking. If the tiles are thick they can be fired standing, balanced on their sides and if not lay them onto a flat shelf covered with a thin layer of sand, which helps their movements as they contract during firing.
Read more about: Kiln – Furniture

ca: CARREGAR (c) Peces decorades

es: CARGAR (c) Piezas decoradas

Packing decorated work: Great care must be taken so that the kiln and the work being fired are not damaged in any way. Slip and glazes must not touch anything, each other, the walls of the kiln, the floor or shelves, furniture, etc. when being fired. All the parts or the footings which they stand on must be cleaned of glaze, since it acts as a glue and when fired will weld on to any object it touches and make it impossible to separate without damaging the work. Read more about: Kiln – Furniture

Packing Plates
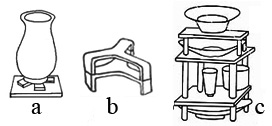
a) Packing – with the danger of glaze running:
Should there be any danger of a glaze or color running, put the vessel on top of 3 or 4 bits and put these on a bisque tile. The tile will stop the floor of your kiln being damaged and if the glaze runs into the space made by the bits, will make it easier to twist and separate the pieces.

b) Plate supports: There are many types of cranks for plates and tiles, these are good if the plates and tiles you wish to fire are made with molds and therefore all the same size, but if handmade and varying in size, they are more difficult to fit in.

c) Tile shelves take up more room but are quicker and safer. They are made up with bisque tiles cut to the required sizes and are supported by tube props. Stilts and spurs can be used, but as putting them on top or under a plate always damages the glaze, the work will have to be repaired and repaired work is never perfect.

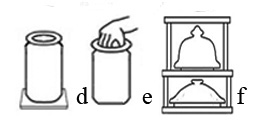
Packing Pots and Lids When decorated it is difficultto to move them without touching and damaging the decoration, some lids are designed so the flange is high enough to put your fingers under the lip to move them. If picked up and a part that is decorated is touched it will have to be repaired when it is in the kiln.

d) The best way is to put the pots and the lids on top of a bisque tile that has been cut down to the size needed; it can be moved, using the tile like a tray and does not have to be touched throughout the whole process, from decorating on the wheel to putting the tile into the kiln as a tile shelf.

e) Pots can be moved by putting your hand inside the neck and using the pressure of your finger against the inside of the neck to lift and move them.

f) Lids, as they are short can be built up one top of the other, using tile shelves with tube prop, to support them.

Packing Tiles
Tile stands also known as cranks, the illustration shows two types of tile stands.
g) is dismountable.
h) is in one piece. For kilns that open at the side both can be used but for those that open at the top, the second is more convenient as it can be lifted up and put down into the kiln.

A big problem with tile stands is fitting them into your kiln without wasting space. Make sure when you buy a kiln that there is enough room to stand one on top of another. One of the disadvantages of standsnts for different sized tiles is that they are of different heights and this makes building up floors complicated. Kilns that open at the top have to be packed from above, so the large tile stands must be made in one piece. They have to be held at the top and lowered into the kiln. If your kiln opens from the front, other types of stands can be used. If you work with tiles a lot, you should have numerous stands, so when you have finished painting, the tiles can put directly into them, thus avoiding the damage that occurs when moving them from one place to another. The less you touch and move your finished work, the better.

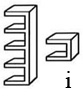
i) Small separate wall-stands: These are handmade to hold from two to four tiles of any size. They are short because they are separate and have to be held together securely when being moved. They are used mainly for packing borders 7,5 × 15cm, corners 7,5 × 7,5cm, and to fill up the leftover spaces when packing. In the section on molds, how to make them is explained.
Read more about: Cranks / Cranks – Putting tiles in cranks / Cranks – Walls / Mold: 5 Hand made cranks

ca: CARREGAR (d) Procés

es: CARGAR (d) Proceso

Click on the title to see more images

Packing kilns that open at the top; use tile stands which are made in one piece, these shown in the photos below, hold 14 tiles of 15 × 15cm, and wall-stands that are in two pieces and can hold tiles of all sizes. Here they are holding corner tiles of 7, 5 × 7, 5cm and borders of 7, 5 × 15cm. They are short, so they can be held and are handmade to hold from one to six tiles.

One floor holds seven tile stands, try and place them so the wall of one is against the edges of the tiles of another, this allows them to touch as they are both clean of glazes and the small wall-stands can rest against the big stands to make them safer.
Packing and moving the wall stands should be done on the sides of the kiln or on a bar of wood that can be laid across them. Wall stands are in two separate pieces and when full are difficult to move, hold both sides firmly, lift them up and move them down into the kiln, to fill the spaces.

With big stands put the tiles into each one and level and straighten them out by putting a straight tool, like a ruler against the sides, then lift up a stand, holding it at the top and let it down into the kiln. Fill in the spaces left with small wall-stands. This kiln can hold 7 stands on each of the two floors and on the top there is enough room for odd tiles, in the photo (e) below there here are four, the last photo (f) shows them fired.

To see close-ups of the four tiles read more about: Firing – Colors before and after firing / Kiln – Furniture / Firing (b) Process

ca: PALETA

es: PALETA

Paddle (and anvil):
a) A paddle is a piece of thick heavy wood.
b) An anvil is an oval shaped piece of fired clay, wood or stone.

The paddle is like a bat, it can be with or without a handle and is used to hit a clay wall on one side while on the other an anvil is held to support it. This thins, flattens and compresses the clay, it makes the walls strong and as you work you can build up and form a shape. They are used to flatten out coils.
Read more about: Anvil

ca: PINTAR

es: PINTAR

To paint is the act of putting liquid colors on to a surface using a brush. It can be figurative, abstract or just a flat surface.

ca: PINTAR CERÀMICA

es: PINTAR CERÁMICA

Painting pottery can be done in the following different stages and by the following methods:
On to raw clay with slips and glazes.Read more about: Slip decorating
On to bisque with oxides or glaze stains.
On to fired glazes with enamel colors. Read more about: On-Glaze
On to a glaze-base with oxides or glaze stains. Tiles: Majolica: 5c – The stages of painting tiles / Majolica: 5d – 12 Tile Designs Jars: Majolica: 5g – Painting jars / Majolica: 5h – Twelve photos of Albarellos – Chemist jars Plates: Majolica: 5e – Preparing to paint plates / Majolica: 5f – Twelve plates painted

ca: ESPÀTULA

es: ESPÁTULA

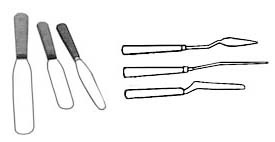
Palette knife: the word knife leads you to think that this instrument is used for cutting but a palette knife cannot. It is metal, has a flat, thin, flexible blade with a half circular end, to a misunderstanding as it means it can cut and a palette knife cannot. It is metal, has a flat, thin, flexible blade with a half circular end, which is attached to a handle. The drawings on the right show ones with different shapes and the only part that is curved is the neck that connects the handle to the blade. They are made in different sizes and used for mixing, blending, cleaning, grinding down colors and stains and other products.

ca: ESCOMBRA AMB FULLES DE PALMA

es: ESCOBA DE HOJAS DE PALMA

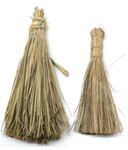
Palm brush is a brush made with leaves from palm trees. This brush has the form shown in the two photos and can be made in different sizes. If the brush is new, soak it in water, as the older and more used the brush, the better. Knock it about a bit to give it an uneven texture. It can be used for dusting the bisque and is very good for making uneven textures with glaze and colors.
Read more about: Glaze-Base (m) Textures / Spattering

ca: TRITURADOR DE PAPER

es: TRITURADOR DE PAPEL

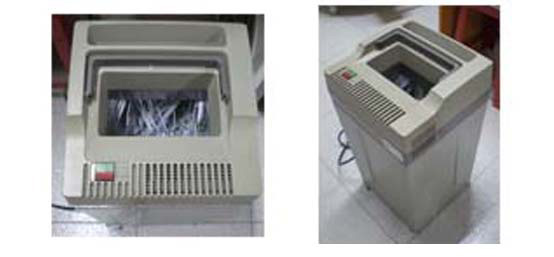
Paper cutters are machines to chop unwanted paper into small pieces. There are many types and a small electric one is easy to use and not expensive. Cut down paper is very useful for packing delicate ceramic objects.

ca: PARTÍCULES

es: PARTÍCULAS

Particles are fine grains of 50 microns or less and are minute parts that cannot be seen. Grain defines sizes larger than 50 microns. Clay dries quicker on the outside than in the thicker parts, so if the work has varying densities, great care must be taken that all the particles are completely dried out, or cracks will result.

ca: LLAPIS

es: LÁPIZ

Click on the title to see more images

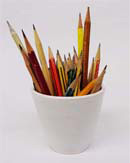
1) Pencil is a slender tube of wood containing a thin center of lead or a coloring material and is used for writing and drawing.
2) Ceramic pencils look like ordinary colored pencils but they are prepared in a special way to draw on bisque or a glazed surface. When the design is finished, it has to be covered by transparent glaze and the clear colors can be fired at between 720º C and 980º C and the strong, darker colors, black, blue, green and brown to 1250º C.

Pencils are made in many different ways, depending what you want to use them for drawing or writing, for colors, charcoal and lead pencils, etc., this part is known as the core and is made with a protective cover, usually wood to prevent it from breaking and dirtying your hands when being used. Lead pencils are still known by this name, but are now made with different products because lead is poisonous, The cores are made in different strengths, from a very fine hard one to a large soft one and each is graded and marked. The lead wears down with continued use and has to be sharpened by cutting or peeling down the cover.

PENCILS – Making them last longer.
These photos were taken in a school for ceramics and at the end of the day one off the student had the job of looking after the pencils. They all had to be sharpened left the right way up in the bowl and if needed made longer. To do this a plastic tube, cut to the right length, wide enough so that when the pencil is pushed into it, it fits tightly and can be used again.

ca: MÀ DE MORTER

es: MAJA DE MORTERO

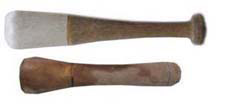
Pestle is a tool used for breaking down solid products by hand. Some are made of wood but the best have a wooden handle and stone head. They are usually sold with a mortar which is a bowl made in china or stone.
Read more about: Mortar

ca: FOTO CERÀMICA

es: FOTO CERÁMICA

Click on the title to see more images

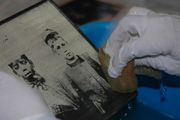
Photo Ceramic is the name used to refers to the process of applying photos onto ceramics. The first tests were carried out in France by Lafon de Camarsac (1821-1905), starting in 1851. Their novelty consisted in finding the way to produce a coat of ceramic colors which when vitrified became a permanent image. It was made to use with jewelry, watches and portraits replacing “painting on enamel”, which was a very complex method as the work had to be perfect and very small in size. At this time they also began using it in graveyards as it was particularly durable in adverse weather conditions and over time. Mathieu Deroche, Lafon de Camarsac and Guyot were the best known photo ceramists during this era, capable of creating photographic portraits with artistic dimensions, due to their training as miniature portrait painters on enamel.

The two oldest and most traditional methods in photo ceramics date from this period.
1) The process of using direct gum bichromate (dipped finish): this procedure is applied onto bisque or glazed pottery. A photosensitive emulsion is prepared with 2 parts of ammonium dichromate or potassium, 2 parts of colloid (Arabic gum or polyvinyl alcohol, egg, gelatin, or sugar) 1 part of distilled water, 1 part of ceramic colorant (pigment or oxides) 1 part of flux. Once the ceramic surface has been emulsified it is exposed to UV light (sunlight or lamp) with a negative film in direct contact with the surface. The heat stroke lasts approximately 15 to 20 minutes, depending on the strength of the light or time of the year if it is the sun. Then the image is developed by using water tp dampen the parts of the emulsion that were not insolubilized by light. This causes positive images to remain in the designs in the parts which remain fixed and insoluble to light.

2) The traditional process of indirect gum bichromate: this procedure is prepared on glass and then moved to the ceramic surface, which is why it is called indirect. A photosensitive emulsion is prepared with 2 parts of sugar, 1 part of Arabic gum, 1 of dextrin and 1 part of ammonium or potassium dichromate. The elements are put together as powder and then 6 parts of distilled water are added. It is then placed on a glass and when dry, it is insolated by contact with a positive film. Insolation with UV light (sun or lamp) is from 2 to 3 minutes. The emulsion will be sticky in the parts where the light does not touch and dried and attached where it does. As you work with a positive image, which is sticky (and it is where the image that is latent is produced) you carefully pass a ceramic color in the form of powder over it with a brush or your finger. This stickiness adheres to the color, which is a powder and the images appear with all its shades and half-tones. Finally a layer of collodiom is painted over it and when dry, it is put into water which loosens it allowing it to be peeled off the glass and moved onto a ceramic surface.

Two important issues are worth mentioning:
• The dichromate or ammonium or potassium dichromate is highly toxic and should be handled carefully. Do not inhale, eat or touch it and always wear gloves.
• These two procedures described are only two of the most ancient processes used, but there were many other methods with dichromates and ferric salts.

By 1960 Kodak produced a procedure of photo-sensitive resins called Cermifax which was marketed for several years with different names like Decorem or Picceramic.

In recent years digital technology has produced a system of digital photo ceramic glaze transfers that can be vitrified. The images from the computer are sent to a laser printer suitable for ceramic colors (toner ceramic) and printed on a paper for transfers and then applied to glazed ceramic. Basically the ceramic colors (mixtures of pigments and fluxes) are ground and mixed with a hot resin. On cooling the solidified mixture is pulverized to the size of the toner particle (approx. 5-6 microns). Excellent results are obtained, since the color range is wide and the surface quality is very good. The temperature for firing is between 850° and 900° C.
Link to Author – Graciela Olio.

ca: CALAT - Decoració

es: CALADO - Decoración

Click on the title to see more images

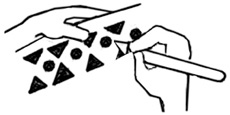
Pierced decoration refers to holes cut into jars and plates as a decoration. Once the clay is leather-hard it can be pierced. Strong, sharp bladed tools and hole boring implements are needed for pierced decoration. The pattern should be worked out in advance and marked onto the dry clay.

1) When making the pattern, take into account that the parts of clay left between the holes must be strong enough not to break, the more spaces there are, the weaker it becomes.
2) Use fine, sharp blades to cut holes.
3) While cutting, support the piece from behind with your other hand or hold an object against it.
4) If the cutting has left a rough edge, smooth it out with a wet soft brush.

ca: PELL DE TARONJA

es: PIEL DE NARANJA

Pig-skin is a badly glazed surface with a pin-pricked texture that resembles pigskin and is also known as orange peel.

ca: GUARDIOLA DE PORC

es: HUCHA DE CERDO

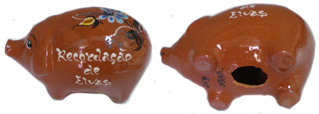
Piggy bank is used to save money; it is a ceramic money box which is hollow and made in the shape of a pig. On the top there is a narrow, open space through which coins can be dropped. Nowadays, they can be bought with a hole underneath and a cork to block it, so they can be emptied. In the past they were made without this and had to be broken to be emptied.

ca: FORATS

es: AGUJEROS

1) Small holes that can appear in slip or glaze that has been under fired.
2) Fine holes that are pricked through the outline of a drawing on paper or transparent paper using a pin-pencil, this method is known as pouncing. The design is then marked on to ceramic work either with charcoal-powder when marking a light colored product or industrial talcum powder with a dark one.
Read more about: Pouncing

ca: LLAPIS PER PUNXAR

es: LAPIZ PARA PINCHAR

Click on the title to see more images

Pin-pencil is used to make holes into the drawing you want to mark onto ceramic ware. The method of marking these holes is known as pouncing. The thinner the pin, the smaller and closer the holes are, the better your design will be marked on. You can either use a mechanical lead pencil or make your own.

Mechanical pin-pencil;
With pliers, cut the head off the pin, put the blunt end into the mechanical pencil in the same way as you would put in the lead. This is practical as the pin, just like the lead, can be rolled down when not being used and is safe.

Wooden pin-pencil;
1) Using a pencil or rod of wood, force a pin into one end with pliers and then use the pliers to cut off its head.
2) Take the pin out, turn it round and stick the blunt end into the hole you have made, forcing it in as much as possible, so it is firm. When not being used, for safety, stick it into a rubber.
Read more about: Pouncing

ca: PESSIC - Fent un bol amb la tècnica del pessic

es: PELLIZCO - Haciendo un bol con la técnica de pellizco

Click on the title to see more images

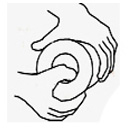
Pinching is one of the oldest methods of giving shape to clay and here it is covered in two sections, of which this is the first. There are many illustrationsat the end of the section;
Pinching clay into a bowl
1) Make your clay into a ball.
2) Then press your thumb into the center of the ball and press the outside with your fingers. Go round the edge, pinching and gradually making the walls thinner and more uniform.
3) As the walls get thinner, start giving it the shape you require.
4) The clay for pinching must be in one piece, parts cannot joined or connected with slip; you can only add to the work when attaching handles or other complements.
These photos have been lent by: Javier Fanlo

ca: PESSIC - Pessic i rotllos d'argila en un bol

es: PELLIZCO - Pellizco y rollos de arcilla en un bol

Click on the title to see more images

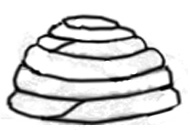
Pinching a bowl that has been started with coils.
1) With continuous coils build up the shape of the bowl upside down.
2) Turn the right way up, flatten and thin the walls by pinching,
These photos have been lent by: Javier Fanlo

ca: FORN POU (1)

es: HORNO POZO (1)

Click on the title to see more images

Primitive firings were made up with wood, coal, sawdust, paper, smoking, in holes the clay pieces they madein the ground, cans, manure, etc. They did not have kilns but built up large outdoor bonfires, which covered the clay pieces they made. The bonfire was made up with combustible material and was usually in an area near where people lived. The bonfires never reached very high temperatures, the heat for firing wasusually around 700° C. The colors of the pieces were irregular as this depended on the intensity of the heat in each zone of the kiln.

a & b) Photographs of rows of clay pots being stacked and prepared for firing in an outdoor pit used as a kiln in Morope, Peru. Utilitarian pottery is used by local families. Sticks, twigs, and dung are used for fuel to fire the pots. Pottery and ceramics are popular crafts in this area of Northern Peru, and techniques are essentially unchanged over thousands of years.

c) Photograph of a proud boy holding a clay pot that he crafted in Morope Peru The child is member of a family that have been ceramic potters and craftsmen in this rural village for generations Most of the pots produced by the family are utilitarian vessels but this boy expressed himself as a sculpture artist The pot is a form of folk art Photograph taken by Nathan Benn August 9 1989

Copyright Nathan Benn: Pit firing

ca: FORN POU (2)

es: HORNO POZO (2)

Click on the title to see more images

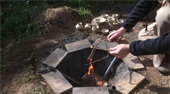
The firing of clay started thousands of years ago. At first the work was left in the sun to dry, then primitive man realized that the hotter it got the stronger it became and started using bonfires. The first evolution was pit firing it’s one of the oldest methods of firing; pits are spaces in the ground, they can be a natural formation or dug out by hand.

Plate and pots are prepared with clay and left to dry, when leather dry or after bisque firing they can be burnished or decorated with oxides and when bone dry they are put in the pit for firing. Each piece is filled and completely surrounded with a combustible material, such as sawdust, leaves, salt, wood shavings and small bits of wood. When the pit is full it is set on fire, from above or below as shown in the photos and left until the fire is completely consumed. The firing is slow, between 24 and 48 hours if it is a small pit, and it is fired until it reaches a temperature of approximately 900º C.

When the fire has cooled the work is removed and cleaned with water. The colors and tones of the work depend on which materials have been used for firing.

Over the years the same method has always been used, what has changed is the structure of the kilns used for wood firing, they are now made with bricks and metal or perforated metal drums can be used. They are installed outside the studio and in this way the firing, colors and temperatures, etc. evolved.

The following describes part of the experience of firing using primitive kilns. The description and the photos are by Fernando Malo: http://www.fernandomalo.com

At Ceramic Activa, we have started to go back to making pieces again playing with clay and pottery. We had an exhibition 33 years ago with Ángeles Casas showing pieces that had come out of our kiln, a hole in the ground where pieces were fired using sawdust. Today we have christened it “Pit Firing”.
Looking for simple methods, using minimal resources and leaving aside the normal methods of firing pieces in a pottery studio, we started to construct a kiln with the same earth as the pieces to be made. We made a small hole in the earth, took out the earth, kneaded it, formed the pieces and returned them to their origin but added fine sawdust, the heat, temperature and the magical transformation of the clay, the enhanced strength, color and sound of the fired work.

ca: GUIX

es: YESO

Plaster is a composition of lime or gypsum, sand, water. It is applied onto walls, ceilings, etc., to form a surface with a flat finish, then left to harden and dry after which it is usually painted.

ca: GUIX DE PARÍS

es: YESO DE PARÍS

Plaster of Paris: Is an industrially made powder used for many different purposes from mending broken bones to making molds. It is very easy to work with, just pour water into a bucket and tip the plaster of Paris into it until rises above the water level. Mix, stir and smooth out all the lumps by hand, using a large metal beater for cooking or a paddle paint mixer which can be attached to an electric drill. In about 3 minutes it will start to thicken and when it acquires a heavy texture, pour it over or into the piece you have prepared to make a mold from. Read more about: Mold

ca: PLASTICITAT

es: PLASTICIDAD

Plasticity: refers to the correct pliability of clay for modeling. It is when you have the right combination of clay and water so as to be able to work and make an object without it collapsing. By kneading the clay, you can obtain the plasticity required for your method of working.

ca: PLAT

es: PLATO

Click on the title to see more images

Plate Plate: Comes from the word “plata” which means silver in Latin. It originally described flat pieces of silver, which the rich ate off. When ceramics became commercial, the word changed and became “plate”. The word plate has many different meanings but when used in ceramics it applies to dishes made to use in relation to food, side plate, serving plate, soup plate, etc. and can be made of earthenware or porcelain.

ca: PLAT - Tornejat en ceràmica.

es: PLATO - Torneado en cerámica.

Click on the title to see more images

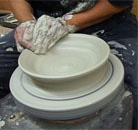
Plate throwing: Everything to do with the first stages of working on the wheel with clay can be found in six files: Clay is the first and they are all linked. Throwing each piece is filed under its own name; Bowl – Throwing / Teapot

Because a plate is low and there is little space between it and the wheel, when the turning is finished, it becomes difficult to move without deforming it. So work on a wheel bat , this is like a tray, which allows you to move and leave it until it is leather dry. Then it can be turned over, put back on the wheel and the footing can be formed, all imperfections on the back should be removed and smoothed off and if it is going to be hung up as a decoration, holes to hang it must be made in the footing.

Note: These are links to all the sections on throwing in alphabetical order.
Bowl Throwing / Cylinder Throwing / Jars Throwing / Lids (c) Throwing / Lids (d) Throwing Cones / Lids Knobs (f) Attached / Plate Throwing / Stack – Throwing / Teapot (a) Body / Throwing – with a tube

ca: PRESTATGES PER A PLATS

es: ESTANTES PARA PLATOS

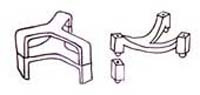
*Plate setters*are industrially made table stands that hold decorated plates when being fired. They have three legs and are designed to stand one on top of the other.
Read more about: Packing (c) Decorated work

ca: ESTANTS PER A PLATS

es: ESTANTES PAR A PLATOS

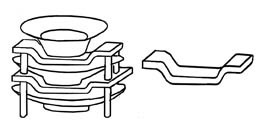
Plate shelves: are made with a curve to hold plates, they save space and are good if you work with many plates that have the same shape. They are built up using tube props to form bridges one on top of another
Read more about: Packing (c) Decorated work

ca: PLATS Suport

es: PLATOS Soporte

Plate stands: are to support plates vertically for displaying or working.
The structure must big enough to hold the largest plates you work with and strong enough not to lose its balance with the weight of the plate.
Plate Stands
a) Photo of one that is handsmade.
b) A drawing of how to use it.
c) A crank and foam rubber used as a plate stand.
d) Plastic plate stand for displaying plates.
When working rest the plate on a bit of foam rubber, this stops it from slipping and helps to avoid damaging the glaze-base round the edge if it has to be turned. For this reason the edge is always the last part to be painted. When the main part is finished, put the plate on a wheel and repair and paint the outer edge.
Read more about: Majolica: 5e – Preparing to paint plates

ca: DESENGANXAR LES PECES

es: DESPEGAR LAS PIEZAS

Plucked ware occurs when decorated work is being fired and a glazed part touches the furniture, wall or other objects. The glaze acts as a glue and separating these parts is difficult and always damages the work.

ca: MOLINS D'ARGILA

es: MOLINOS DE ARCILLA

Plug mill: is a machine for mixing, compressing and recuperating clay. They are run by electricity and made in many different shapes and sizes and important if you work with large quantities. Clay must not be too dry to put through the plug mill, which will recondition and consolidate it so that it can be used again and also improves its strength and workability. There are plug mills for producing both large and small quantities. The name now more commonly used for this machine is extruder.

ca: ENFONSAR EN UN BLOC

es: HUNDIR EN UN BLOQUE

Plunge Pot is a pot formed by pressing a solid object, like a round or square pole of wood, into a block of clay. This forms the center then the outer part can be shaped by slicing, beating, etc.

ca: VERÍ

es: VENENO

Poison: All dust in ceramics can be dangerous, as many of the substances used are poisonous. Most become insoluble after being fired; nevertheless, great care should be taken with raw products. Goggles, masks and gloves should be worn when working with them. A vacuum cleaner is a must for a ceramic business as a broom just sweeps the powders back into the air. Read more about: Vacuum Cleaner

ca: PAL

es: PALO

Pole is a long, round, thin, strong bar that can be made of wood, plastic or metal.

ca: GLICOL DE POLIETILÈ

es: GLICOL DE POLIETILENO

Polyethylene glycol: is the technical name for medium. It is a lubricant substance that is mixed with colors to make them run well, especially used for outlines and screen printing, (eliminated in the firing).

ca: PORCELLANA

es: PORCELANA

Porcelain comes from China and is a mixture of kaolin and feldspar and its main qualities are its strength and whiteness. Bone China was invented in England in the 18th century.

ca: PORCELLANES

es: PORCELANAS

Click on the title to see more images

History: Porcelain paste is of Chinese origin. It is said that Chinese ceramists prepared mountains of porcelain for their grandchildren and left it exposed to the elements for two generations so it became more plastic, this was approximately 1500 years ago.

It was Marco Polo in his travels who introduced it into Europe. There were many attempts at copying it, but it was not until the eighteenth century that the true composition of porcelain was discovered and the first porcelain factories started in Europe

Characteristics of Porcelain: Porcelain is a translucent white paste, hard (it cannot be scratched by steel), uniform, very sound, fully vitrified, which displays an interior of very fine, bright particles when broken. It is impervious to water and resists frost well, even when not covered with a glaze. These characteristics of the paste, especially its translucency and vitrification, define porcelain. If it retains all these features minus the translucency, then it is a ceramic.

Porcelain is ceramic slurry consisting of: kaolin, feldspar and quartz in different proportions. See diagram Triangle (a)

There are different types of porcelain:

Dental Porcelain: This porcelain is basically feldspar with a little quartz and a little kaolin in the composition. It is a self-glazing paste which is used to make dental prostheses. Due to its high percentage of feldspar, it can only be used with molds. Photos b) and c)

Bone Porcelain: Bone china was produced for the first time in England in 1794. The main feature of this compound is that it is very white and very translucent. It has a high impact resistance and is used to make tableware. The firing temperature is around 1200º C and upwards. Besides the three essential components, kaolin, quartz and feldspar, it contains a percentage of tricalcium phosphate which makes it especially white. Photos d) and e)

Hard Porcelain: Hard porcelain is very white, translucent and fully vitrified. It consists largely of potassium alumina silicates. It has technical qualities of strength, refractoriness and thermal insulation. The firing temperatures range from cone 9 (1280° C) to cone 16 (1460° C). Photos f) and g)

Steatite Porcelain: This type of porcelain is characterized by its ability to efficiently withstand thermal shock. Its main component is magnesium or lithium. It is used to make thermal insulators for the cables used in high voltage electricity pylons, to make dishes that can be used on a direct flame and to be a component of car engine parts. It is good for Raku. They are porcelains with a low quartz content and high in alumina. Sillimanite (Al2 If O5) is often used instead of quartz. Compositions containing at least 50/55% of kaolin and less than 25/27% quartz are the most resistant. Photos h) and i)

Soft Porcelain: Soft porcelain is the term used to describe porcelain compounds that are vitreous, white and translucent and vitrify below a cone 12. It is advisable to bisque fire with a cone 8 as it deforms a lot, and glaze fire at a lower temperature. It is used for dinner services. Photos j) and k)

Vitreous Porcelain: This porcelain has been developed for making sanitary ware as it is a strong material and relatively waterproof. It has a high mechanical strength and deforms very little during firing. Photos*l)* and m)

Bibliografía:
F. Singer i S.S. Singer.Cerámica industrial. Bilbao: Ed Urmo, 1971. Enciclopedia de la química industrial, vol: 1.
F.H. Norton. Cerámica fina, tecnología y aplicaciones. Barcelona: Ediciones Omega, 1975.
Antoine d’Albis. Traité de la porcelaine de Sèvres. Dijon : Éditions Faton, 2003.

Written by Montserrat Altet Girbau

ca: POROSITAT

es: POROSIDAD

Porosity: is the amount of water fired clay can absorb. Clay in the plastic state has different particles filled with water and when fired to 600ºC it is transformed and becomes ceramic and is known as bisque. The spaces left where the particles have burnt away make the bisque very porous.

As the firing temperature increases, it continues to shrink so there are fewer spaces and the body becomes less porous. Each type of clay has a set temperature at which it completes its vitrification and if this is exceeded it can deform and melt. Porosity is measured by weighing the piece, boiling it in water, weighing it again, and calculating the increase in weight.

ca: PALES D'ELEVACIÓ

es: PALAS DE ELEVACIÓN

Click on the title to see more images

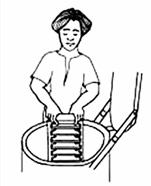
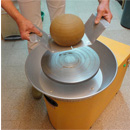
Pot lifts provide an easy method for removing thrown pots from the wheel without damage. They are made from stainless, high-strength aircraft aluminum alloy and are available in three sizes to fit a wide range of pottery shapes.

ca: POTASSI - FELDSPAT

es: POTASIO - FELDESPATO

Potash Feldspar Feldspars are distinguished thanks to their structure and chemistry. Potassium (K) feldspars are polymorphous, so they have the same chemical composition and their molecular weight is 197.12. Potassium feldspars melt at about 1200ºC. They might also produce a crystalline phase which helps to its opacity. That’s the reason why in industry potassium feldspars are often especially used for opaque enamel, while sodium feldspars are used for bright enamel.

ca: POTS

es: TARROS

Click on the title to see more images

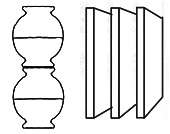
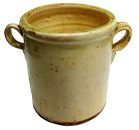
Pot, also known as jar, is a ceramic product made to hold many different products such as earth, flowers, herbs, food, sugar and salt. It can be any size, from a large flower pot for a garden to a small salt pot for the table. It always has an opening at the top and can be with or without a lid.

ca: POTS - Colors ja preparats

es: POTES - Para colores ya preparados

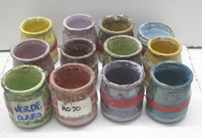
Pots for colors are usually small glass yoghurt pots used for keeping prepared colors. These pots are marked with insulating tape, each painter has a different color so he knows which ones are his. If there are very similar colors, they are named.

ca: POT - Aigua per netejar pinzells

es: BOTE - Con agua para limpiar pinceles

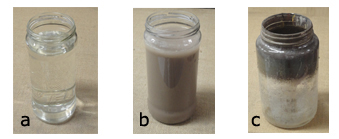
A pot or jar for cleaning paint brushes should be made of glass, be large and have a wide opening. The inside walls should be kept very clean so you can see how dirty the water is. As the dirty water adheres and dries on the inside of the glass it becomes impossible to see if the water is clean or dirty. Water carried on brushes can affect the colors you are using.

a) A clean pot. b) A clean pot with dirty water. c) A dirty pot without water

ca: TERRISSAIRE

es: ALFARERO

Click on the title to see more images

POTTER - Stages of working Potter: the word originally referred to the person who made ceramic pots and now applies to a person who works in any form of handmade ceramics, working with clay, decorating in one of the hundreds of different methods there are. The illustration shows six hand painted tiles illustrating the working process.

ca: CERÀMICA

es: CERÁMICA

Pottery is clay that has been formed into a shape, dried, fired and then glazed and can be a decorative or practical vessel. Clay is a natural product dug from the earth, a product resulting from the decomposition of rock within the earth’s crust during millions of years and this decomposition occurred when water eroded the rock, breaking it down. In the past, many ceramic firms were based in certain locations because the earth there was suitable for making clay and each firm went through the whole process, from digging out the clay to selling the finished products. The clay was dug out of the ground, mixed with water and screened to clean, removing all insoluble material. The water was filtered off the clay and the clay was left until it reached a semi-dry state, after which it was cut and separated into large blocks and stored in caves, sometimes for up to two years, as ageing helps to assist the plasticity.

Before being used, the clay has to be well kneaded to form a smooth plastic body for throwing and molding tiles, pots and plates. For the first firing, the pieces have to be left until the clay is bone dry. The firing of clay should start slowly, to allow it to completely dry out until it reaches 600ºC, when it turns into a ceramic. The firing continues until it reaches the required temperature for the type of clay being used. There are many different types of clays, with different colors, textures and different firing temperatures and the higher the temperature it can be fired at, the stronger it becomes. Products in clay can be formed in many different ways, with the potter’s wheel, molds, sculpture and cut or stamped into squares or slabs and they can be decorated by shaping the clay with different techniques, fluting, drawing, coiling, indenting, etc.

Clay, when fired, changes into a material that is solid, breakable but still porous and is known as bisque. The firing can be carried out using two different methods, slip firing, when the clay and colors are fired together in one firing or bisque firing, when the clay is fired, becomes bisque, is then decorated and fired again. Each of these methods has many variants and it is the glaze in the slip and the decorating that make the clays vitreous.

ca: CERÀMICA A PROVA DE FOC - Per cuinar.

es: CERAMICA RESISTENTE AL FUEGO - Para cocinar

Click on the title to see more images

Flameproof ware applies to pottery products prepared to take direct heat from open fires and gas. In many Mediterranean countries this has been used for many centuries.

There are three types:
1) When a piece is glazed on the top surface and round the edges to make it watertight. The bisque is left underneath as it can take the heat directly while being used for cooking. These pieces usually have a curved base, originally designed for cooking on an open wood fire. Before using them for the first time, soak in water for 24 hours.
2) When glazed on all sides, they are to use inside an oven, never directly on top of heat.
3) In a town called Pereruela, in the province of Zamora in the center, northeast of Spain, women do all the pottery. Their specialty is plates used for cooking, made in refractory. They are thick, strong, cheap and a beautiful yellow color when first bought, but with use they turn to a dark brown. They are extremely strong and are used for both types of cooking, directly on top of the heat and inside the oven. Before using to cook with, fill them up with water and let the water boil for a few minutes.

Illustrations (a) and (b) show a selection of plates and (c) shows three plates made in Pereruela. The first is the original color and the last two have been used for many years.

ca: TORN DEL TERRISSAIRE

es: TORNO DEL ALFARERO

A potters wheel is an instrument used for shaping and decorating pottery. There are three methods of working which are characterized by the type of energy used to turn the wheel.

Read more about: Wheel hand / Wheel foot and electric

ca: PUNXAR

es: PINCHANDO

Click on the title to see more images

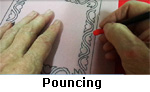
Pouncing is to prick holes Pouncing is to prick holes through the outlines of a design so it can be marked on to another object. Lay a thin piece of cloth over a hard surface. The cloth should be just thick enough to let the point of the pin go through the paper. Flip over the tracing paper with the design marked on so the back is facing up and lay it on top of the cloth. Pounce holes through the outlines with a pin pencil.

Remember, the smaller the holes and the closer together they are, the better the drawing will be marked on. The marking comes out more clearly when the paper is flipped over for pouncing, because the rough side is not against the tile.

Using tracing paper is better because you can see that it is placed correctly. If the design is going to be used a lot, it should be printed or drawn with a marking pen, to make it permanent, as it has to be cleaned. The pounced drawing is laid onto a prepared product and the pounced lines are rubbed with a marking bag full of charcoal powder. When finished, the tracing paper should be cleaned and the best way is to lay it on a flat surface and with a large soft rubber, rub off the charcoal powder on both sides.

Drawing on paper, If using a design drawn on normal paper put it on a piece of cloth and pounce the lines of the drawing directly through the paper. Once finished turn it over and rub the back, this helps to get rid of the rough texture which could scratch the base when you mark on the design. If the paper is hard and difficult to pounce, you can soften it with a dry bar of soap. If it does not matter which way round the design is used, mark it so the rough side is not against the product.

Read more about: Marking bag for charcoal / Marking Tiles – Large Designs / Marking Tiles – Small Designs

Read more about: File – Filing drawings by subject and size / File – Filing jar designs / File – Filing plate designs / File – Filing tile designs / File – Filing screen printing

ca: ABOCAMENT

es: VERTIDO

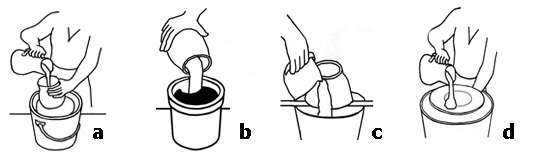
Pouring is a way of putting a glaze or slip on to pottery. It is the method used to cover a piece of clay or bisque by tipping the liquid over the piece prepared. Here it explains how to use it with jars and bowls and tiles are in the section GLAZE-BASE (e) Applying by pouring on to tiles.
There are other methods that can be used; Dipping, Glaze-base (g) Applying by dipping plates, jar and lids and Brushing. Both the two sections on Glaze-Bases can be used for colors and slips.

1) For a bowl and a jug, do the inside first. a) Hold it over a basin, pour some glaze into it, tip it sideways and turn it until the glaze covers the inside wall, b) then tip out the remaining glaze.
2) For the outside of a bowl, c) put a basin on top of a banding wheel, make a bridge with two bars of wood and put what is being decorated, on top, upside down and pour the liquid over it, from the top letting it run down, turn the wheel doing the same until it is finished. This cannot be used for work that curves inwards, dipping is better.
3) For a plate, d) hold it the right way up over the bucket where the liquid is kept and with a large spoon put 2 or 3 spoonful’s in to the center of the plat. Now carful tilt the plate so the liquid covers it, move it so it cover several times, then tilt off the un needed glaze back into the bucket. Clean the edge.
This video shows you exactly what to do, it is in two sections, you have to see them both and this is the second How to a make a Mermaid Plate
4) Do the same for the back as with the bowl.

Note: Pouring is also the process of filling a plaster mold with casting slip (liquid clay) to create a clay object. Once the plaster mold is removed, the clay object is known as greenware or unfired clay.

ca: POLS

es: POLVO

Powder is a solid substance reduced to a state of fine, loose particles by crushing, grinding, disintegration, etc.

ca: MODELAT per pressió

es: MOLDEADO A PRESIÓN

Press molding is the method used to make plates with a slight curve that are in one piece. .

There are two types –

A hump mold curves outwards and a flat, rolled out piece of clay is laid over it. It is usually made with a handle, to make separating it from the clay easier.
A drop mold is formed with the curved shape of a plate indented and the clay is laid (dropped) into it.
Read more about: Mold – Press Mold

ca: PROCÉS

es: PROCESO

Process is the continuous action, operation, or series of changes taking place in a definite manner: The process of ceramics is the changed it goes through from clay to become a fired and decorated.

ca: PROCEDIMENT

es: PROCEDIMIENTO

Processing: A series of actions, changes, or functions which result in a product being made.

ca: SUPORT

es: SOPORTE

Prop: is a support used to hold up an other object to prevent it from falling or moving and it can be applied to everything from a pole to a person.
1) A strong pole propped up the branch of a tree.
2) A group helped to prop up an unpopular government.
3) In pottery they are tubes of different shapes and sizes to support shelves and floors in a kiln.
Read more about: Tube props

ca: PROPÀ

es: PROPANO

Propane gas-fired commercial and home-built kilns are quite common. However, this process seems to generate more questions than any other, especially on the subject of propane tanks. If the propane tank is not large enough, for example, it will freeze up and be unable to supply the necessary fuel. People often underestimate the number of tanks needed for a firing and the rate at which a given tank can supply gas.

ca: TRANSPORTADOR

es: TRANSPORTADOR

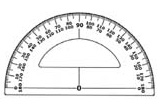
Protractor is a flat, semicircular instrument made of transparent plastic with graduating degrees marked onto it and used for measuring and drawing angles.

ca: ESTIRAR

es: ESTIRAR

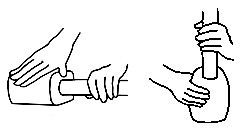
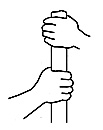
Pulling to make a handle. Hold the clay in both hands; pull it downwards with your right hand, slowly and evenly to make it into a long round cylinder, then press and indent it for shape and form. This can then be attached to the main body of the piece to form a handle. Another way to make a handle is to attach the clay to the jar first and then pull it.

Read more about: Handles / Handles – Loops / Handles – Lug attached / Handles – Lug pulled

ca: PIRÒMETRE

es: PIRÓMETRO

Pyrometer: An instrument for measuring temperatures in ceramics, it works with a sheath which is put through the peephole of the kiln. This transfers the temperature of the kiln to the pyrometer, which interprets it into digits so that they can be read. Some are now made with a temperature controller and depending on their quality they can completely control the process of firing, from beginning to end.