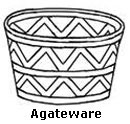
AGATEWARE OR LAMINATION
 Agate is a stone with many colors. Agateware is named after it and implies different colored clays being mixed together. They can be mixed by kneading to create random effects or in separate pieces of different colors to build up a previously planned pattern. Agateware bowls can be created using press or hump molds and agateware tiles by using different shaped frames. Use white or a clear colored clay and add body stains to get the color you require or use colored clays that can be bought. It is always better to use the same type and make, as mixing different ones can cause problems such as shrinking in different proportions.
Working sequence and kneading colors together
1) First of all knead the colored clays separately.
2) Lay them out one on top of the other and knead them together, not too much, otherwise they will blend completely.
3) Slice off a part of the clay, so that you can see to what extent they are mixed.
4) Make your jar remembering that during the throwing and while it is wet, you cannot see the pattern.
5) When finished leave it until it is leather dry, then scrape off the outer skin of clay and you will be able to see the pattern.
6) The clay can be glazed and then fired or first bisque fired and then glazed.
Some clay colors improve greatly with glazing.
CREATING PATTERNS IN COLORED CLAY

1) Draw and plan a design showing: sizes, shapes and colors needed.
2) If a shape has to be repeated many times, cut it out in cardboard, plastic or very fine wood so as to be able to copy it exactly.
3) Roll out the different color clays using slats so they are all the same height.
4) Cut them in strips or in the shapes needed. (a) and (b)
5) All the parts that have to be joined should be scored and dampened with slip. When pressed together the slip works like glue. Make slips (clay plus water) from the colored clays being used.
6) On a flat surface lay the different colored strips of clay next to each other and join them by putting a bar of wood on each side and pushing them together. c)
If different shaped pieces are required, roll out the clay into a cylinder to the diameter needed then stand it up, put it between two slats, pull a cutter along the top of the slats, separate the two parts and continue cutting until you have all the pieces needed of the same height. The shapes can then be changed using your fingers or bars to form the shape required.

To make a circle of different colored strips, make a cylinder of the center color. Then roll out flat pieces of different colors. Cut one edge at 45º and then dampen this edge with slip or a soft brush and water. Lay the cylinder of clay on top and parallel to the straight edge and roll the strip round it. Cut off the unwanted clay and join the two sides, then roll backwards and forwards to make sure that it is joined properly and that there are no air bubbles, then go on adding all the colors needed for the design.
Cut the roll of clay into slices, which will be circles of different colored lines then mold them into the shapes required. Agate patterns can be built up to form a flat object such as a tile or a shape using a mold. A mold in two pieces can be used but the places where the two pieces meet must be planned as an integral part of the design. It is easier to use a hump or press mold. Put the prepared pieces into the mold to form the pattern, scoring and using slip to join every piece, pressing them together.

When the clay is in the mold it should be left to dry extremely slowly, to allow the pieces to join and shrink to the same degree. Once hardening starts you can begin, on the inside, to clean it up using a soft rubber kidney or fine sandpaper. When leather-dry it can be removed from the mold without suffering distortion and the outside can then be scraped clean in the same way. When cleaning the outside, always support the inside with your other hand.
Read more about: Molds / Molds-Press Molds / Molds for tiles
