ca:
MAJÒLICA: 2a - Història
es:
MAYÓLICA: 2a – Historia
The Arabs conquered Spain in 714 AD, but technical knowledge about ceramic decorating did not reach the country until three centuries later. It is believed that it started at the beginning of the 9th century in Iraq, in the towns of Basra and Chuff. In the 9th century in Samarra, a town one hundred and fifty kilometers from Baghdad, they began producing large quantities of decorated ceramics. Their work was exported to Algeria, to the West, and Persia, to the East, where remains of it have been found.
In 969 AD, the Fatimids, whose capital was near Kairouan, now Tunisia, conquered Fustat, where they ruled for two hundred years and completely rebuilt the town. Fustat is the old name for Cairo, Egypt. It became a central crossroad for the Arab world. With Persia and Arabia on one side, the Mediterranean Africa on the other, and the neck of the Nile as a port to the Mediterranean and the rest of Europe, Fustat became an important town and provided work for craftsmen and artisans. A great deal of high-standard work was made and exported. It is believed it was from there that it moved on to begin in Europe starting in Malaga, which was then the main port for Islamic Spain, whose capital was Granada.
With the continuous wars during the Fatimid occupation in the 10th and 11th centuries, the craftsmen of Fustat were forced to move elsewhere to maintain their livelihood. The siege of 1169 AD resulted in the destruction of the town and the collapse of the Fatimid dynasty. The craftsmen lost their patrons and by the end of the 12th century the tradition had virtually disappeared. It is thought it could have been brought to Malaga from Egypt, by way of the Muslim settlements in the Mediterranean islands, which were on the trade route between both. Majorca was one of them and it is believed is where the name came from.
Boabdil, the last Arab ruler, was eight years old when he became the leader of the Arab kingdom in Spain. This was the start of the Arab settlement’s economic decline and with it the ceramic industry of Malaga. It had already spread to Valencia, the earliest record of it being made in Manises, Valencia. By the end of the 14th century, it had become a flourishing industry, still using the same production methods and the traditional Arab scripts and symbolism for decoration.
It started to be made in other towns, such as Talavera and Barcelona. The trade was in the hands of the local merchants, but Moorish craftsmen, who had moved from Andalusia to live and work in the peaceful and prosperous Christian kingdoms made this possible. The number of makers increased, as it was now being made not only for the wealthy families, but also for merchants, townspeople, religious communities, and was exported to the Mediterranean and the Low Countries. With this expansion, the Moorish traditions in decoration were gradually changing and being replaced with Christian motives. Early red-gold ware was gradually changing with the increase in production and cheaper materials, the colors could now be made without valuable metals. Plates, pots, tiles for walls, floors, and ceilings were all being produced with blue, a popular and predominant color.
Tiles in churches and private houses started to show figurative conventions It became an illustrated method of informing the illiterate public, decorations on church walls told Bible stories; chemist’s pots were decorated with plants and their Latin names; craftsmen and workmen doing everyday jobs were depicted; tiles showed the process of making wine, bread, oil, and many other specialties.
Then, in 1492, came the re-conquest and the Muslims became the alien minority in Spain. From then on until 1609, with the Inquisition, the entire Muslim population was banished. This affected families who had worked for centuries in carving, leather, iron-work, building, pottery, and every other craft. With this loss and competition from other countries, the ceramic industry in Spain was greatly affected.
The Majolica method started to be produced in Italy in the 15th century in the towns of Deruta and Gubbio and it became known as Maiolica; this change in spelling came about because “j” did not exist in the Italian language. To start with, it was greatly influenced by the Valencia style, leaving the background white, using similar figures, animals and borders, but they gradually developed it, creating beautifully different designs and colors. Using a dark background and the colors in a much more subtle way, the Italians became perfectionists in their work, in contrast to the more free and liberal brush-strokes used in Spain. It spread to other parts of Europe in the 16th century: Holland where it was known as Delft, France as Faience and then to England in the 17th century, where it lasted about one hundred and fifty years and was known by the name of Lambeth and now is known as Majolica.
In the nineteenth century Spain was affected by the disaster of the Napoleonic wars and the beginning of the industrial revolution. In England in 1750, transfers were invented. At the same time England, France and the States, using the Majolica Methods, were inventing the first industrial ways of mass production. They were making jars, plates, statues and tiles. The industry sprang up in many parts of England, the main town being Stoke-on-Trent, Staffordshire.
The first World Industrial Fair was held in London in 1851; it was an international success and influenced all the crafts in both industrial and artistic ways, showing new designs and methods of working. This trend lasted until about 1910 and nowadays, every piece made during that period has become a trophy for the collectors. What is strange is that at this time, in Spain, the last great ceramic business opened using the classical designs and methods. It was in 1908 in Talavera, and was known as Ruiz de Luna, named after its owner. It was internationally known and they exported to America and many other parts of the world. At the end of 1951 it closed, but the town now has a superb museum which displays the work of this firm and the private collection the owner made during his lifetime. The factories are now all industrial, not like before, when hundreds of men worked by hand. There are now a few small firms that continue working on this craft.
Note: Majolica History has 2 sections, to go to the next click on Majolica: 2b – History in Spain
 This section show one of the most important parts of the Majolica method of painting; the brush strokes and the variations and intensities of a color.
  You can make tile designs in two ways; put tiles together to form one picture or design each tile with a complete illustration. With both methons you can mix subjects and make up pictures to the size and shape you want. There are three different sizes in tiles 15×15, 20×15 and 20×20cm.
 Stenciled tiles made for the restoration of a corridor.
  A one-tile design which when rotated forms a pattern.
  LA
LA  The
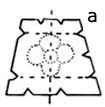
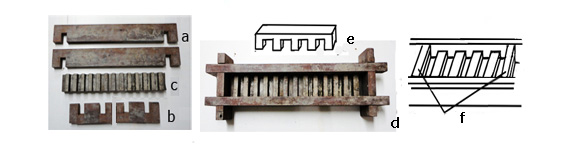
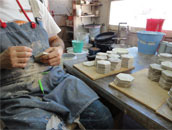
The  There are five pieces of flat relief of four different thicknesses made in refractory clay, It was rolled out to the heights needed, then each piece was cut to the required size and then shaped by hand so the pieces would fit together. It was all bisque fired at 1200º C then decorated using the Majolica method and finally fired again at 980º C.
 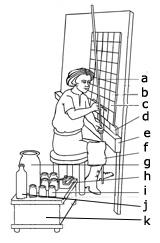 a)
a)  The process of working:
 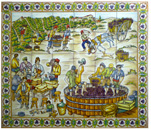 The followimg explains the stages of using colors.
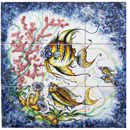 This section has twelve photos of tile designs to show just a few of the many possibilities there are for using the same method in different ways.
 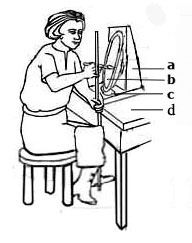 a)
a) 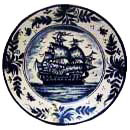 This section has twelve photos of plate designs, to show just a few of the many possibilities there are for using the same method in different ways.
  a)
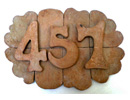
a) 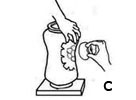 4) Jars can be straight or curved, the designs are difficult to mark and even more so if they curve vertically and horizontally, as shown in the illustration. The transparent paper has to be well darted on all sides to fit in and you need the assistance of a third hand, one to steady the jar, one to hold the prepared design and one to rub it with a marking bag. A design can be repeated around a jar, there can be different designs on each side or just the name of a medicinal plant.
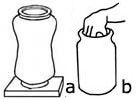
 This section consists of twelve photos showing many jar designs just a few of the possibilities there are for using the same method in different ways.
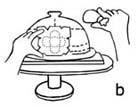

 Once the lid has been decorated, it has to be moved to be put into the kiln. This is difficult to do without touching the colors, especially if the
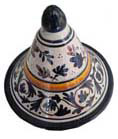
 Brushes needed.

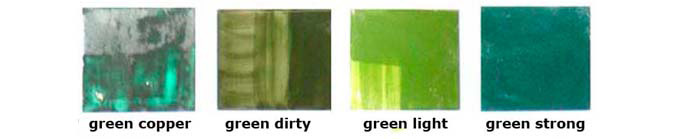
 Preparing and mixing glaze colors: To make up your own glaze colors, mix one portion of color in powder form, which should be the combination of colors needed to produce the desired color, plus three times its volume of transparent glaze. Add water and pass the mixture through a fine sieve. The amounts you make depend on how much you work.
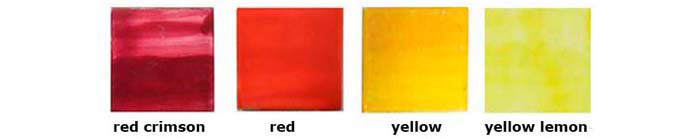
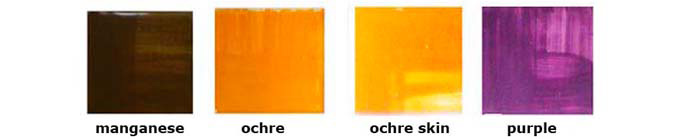
  Introduction to using colors: Painting the outlines is drawing with your paintbrush. Use a cut down brush to paint the outlines and any small details. All strong colors can be used for outlines, the following five colors are the main ones. Remember, when I talk about colors, the preparation of them has been previously explained and stirring them helps to make them run well, this is very important for painting long, smooth strokes.
 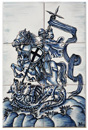 Painting with one color. Blue is the most popular choice for painting different shades of just one color even though any color can be used. The following photos show two different colors—blue and brown.
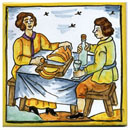
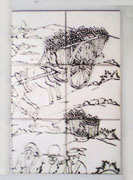
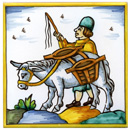 2) Farmer and donkey, Oficio Nº 32
 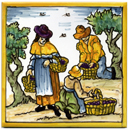 3) Collecting olives Nº4 from a collection of twelve tiles.
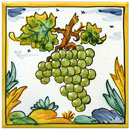 4) Grapes Wine Nº1, from a collection of twelve tiles.
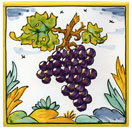 5) Grapes Wine Nº1
  6) Hay Cutting Bread Nº4
  Marking bag, A marking bag has to be made it is to hold a fine powder, either black
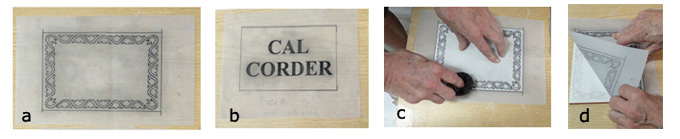
 Marking a large design:
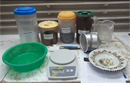
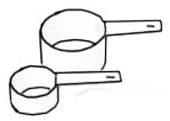 Measuring cups are used to measure quantities of liquids and powders.
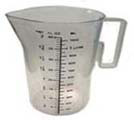 Measuring jugs are industrially made in plastic or glass and can be used for measuring different substances, liquids, sugar etc. The height of the weight or the quantity of liquid of a product is marked on to the outside. In other words, if ½ a kilo of sugar fills up 8 cm in the jug, this height is marked onto the jug. It can then be used for measuring quickly and roughly.
 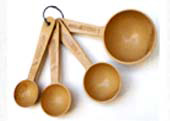 Measuring spoons are used to measure small quantities when mixing colors and other ceramic ingredients. A Beam Balance is much more exact.
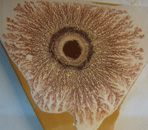
 A formula decoration mocha:
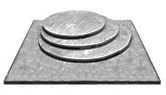
 Modeling tools are designed to work with clay and there are many different types and styles. They can be made of bamboo, boxwood, wood and nylon and are all made in one piece with two heads.
 Tools made of nylon, are very sturdy and the part to hold has a texture to stop the hand slipping. The clay does not stick to them and they are the same shape as modeling tools made of other materials.
 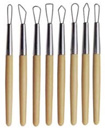 Modeling tools of wire have steel heads and wooden handles. Used for sculpture, scraping, carving, giving shape to and refining surfaces of all types of work in clay.
 Modeling tools made in wood are used for forming with clay, there are many sizes with different forms at each end.
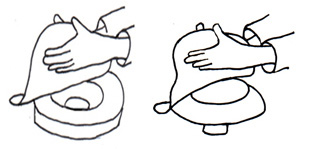
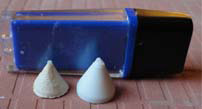 In the photo there are two spurs, the big one was industrially made and the small one molded from it. They are in front of a pen drive to show how small they are.
 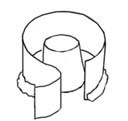 Mold cottle is made out of pliable plastic and can be cut to any size, height and length. It is used to form a circular wall of the size required, round the outside of what is going to be cast.
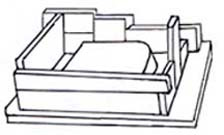 Building with wood:
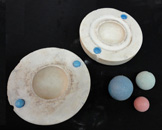 Molds of two pieces or more:
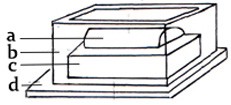 a) Cylinder of clay
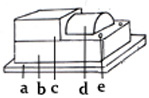
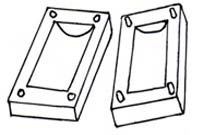 Take off the wood and separate the two halves of the cylinder and take out the clay; separate and clean the plaster and you have your mold in two pieces. The holes at the corners have made four small protruding legs on the second part, so when the two halves are put together they will fit correctly and be held in place.
 Molds for working in relief are made with a flat back that can be attached to walls and thus be used for architectural decorating. It can be in one or more pieces and on the same or different levels.
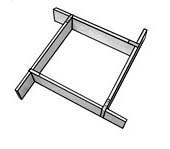 Mold frames are four pieces of wood of the same size, each with a flat metal hook at one end, to attach one wall to another and form a square or rectangle. They are used for building up molds and forming clay into squares.
 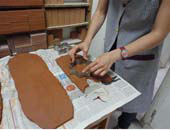 Working process
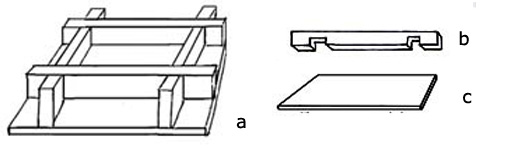
 The Fish was made by Jordi Salvador as the award for the winner of the Premi Llengua Nacional in Catalonia. It is based on a mosaic design by Gaudí that is part of a bench in the house Torre Bellesguard – Casa Figueras, which is shown in photo a).
 The first photo shows the clay molded and being left to dry on top of the planks of wood that were used to hold and pull the tiles out of the mold; each one of the planks carries four tiles and two curved knobs, the tiles are small, hexagonal in shape, with a design in relief.
 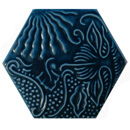 The tiles have been bisque fired and are piled up ready to paint.
 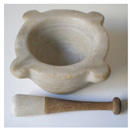 Mortar is a bowl which is use with a pestle for grinding and breaking down materials. They are now made out of china but the best are the old ones that have a pestle with a wooden handle and a pestle head and bowl made out of stone.
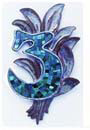 Mosaics are small, different colored flat stones and tiles that are laid together to form a design. At the time of the Greek and Roman Empire, mosaics were used to decorate floors and wall and to tell stories and historical episodes. Throughout the centuries, Arab countries have used them for architecture, for decorating interiors and exteriors of buildings and in designs forming precise, geometrical decoration for floors, walls and ceilings. Today, Morocco is one of the principal countries for this art. In the 19th century, the Modernistic Catalan architect Gaudi used mosaics to decorate his work, ceilings, columns, statues, etc., using irregular shapes and sizes of every color and pieces of different materials, such as china, glass, bricks or stones. The following photos show different mosaic styles.
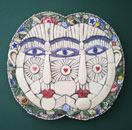 Artist; Cleo Mussi. All her work is made out of pieces of unwanted or broken pottery, plates, jugs, tiles, statues, etc.; it is very personal and individual; she creates small designs for private houses and also large installations for public buildings.
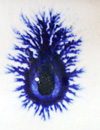
 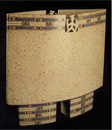 Mottled or spotted referred to colors which were somehow damaged and stained, it was a defect. But since the mid-nineteenth century, ceramics characterized by a mottled brown glaze started to be produced. Later it was improved by the technique of applying a glaze and sprinkling with spots of oxides to give a mottled effect in blue, brown, black, etc. Today commercial glazes are sold reproduce this effect.