LINES - Stenciling
Under stenciling how to prepare the paper and to cut out designs is explained.
The following explains how to stencil a line round a tile
Working method
1) Plastic paper or paper prepared with a varnish can be used. Plastic paper is better because you can see through it and it can be quickly cleaned and dried.
2) Cut the paper to the size needed and make it big enough to overlap the tile and to hold it down while painting.
3) Affix it onto a cutting pad and with a labeller with a fine point and permanent ink draw the guide lines, which are the three sides of the tile and the outline of what has to be cutout. The space between the edge of the tile and the line is 1cm and the width of the line 2mm. The length of the line has to be 13cm.
Note: If using a strong color these measurement are correct, but if you are using a light one the lines should be made 2mm shorter, so they don’t overlap and become darker.
4) Use adhesive tape to join the plastic paper to the cutting pad.
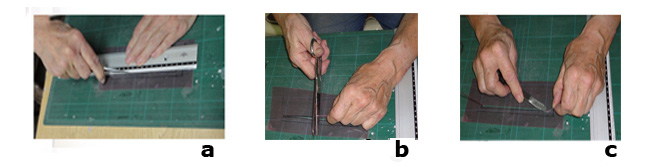
a) Use a ruler as your guide and with a very sharp, strong razor-knife, cut the plastic by pulling it along both lines.
b) Lift it up and cut the center.
c) Bend the each part where it is still joined, flatten the joint and slice them off with the razor-knife.
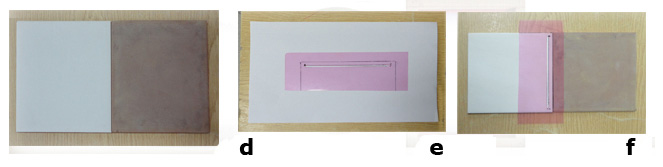
d) Lay two tiles together, one prepared to paint and the other one bisque, this stops the paper from bending with the pressure of the brush stroke.
e) The stencil line cut out.
f) Lay the stencil on the tile so it is correctly aligned and hold it in place.
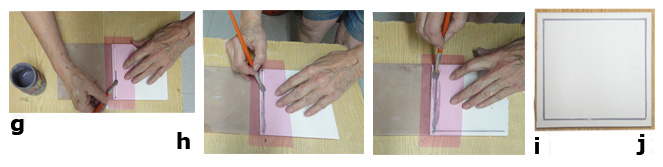
Note: Paint with a stiff, large paintbrush, stir the paint and remove the excess paint from your brush by pressing it against the edge of the paint pot.
g) Paint the lines, it is better to make a brush stroke from the center to one end.
h) Then from the center to the other end.
i) Turn the tile and repeat the line, do the same on each side.
j) All the lines painted.
Read more about: Stencil: (1)
