STENCIL: (3) Preparing the paper
ca: PLANTILLA: (3) Preparació del paper
es: PLANTILLA: (3) Preparación del papel
Preparing paper: Ifyou are going to make a lot of stencils, specially prepared paper can be purchased.
Three ways to prepare paper to make it less absorbent;
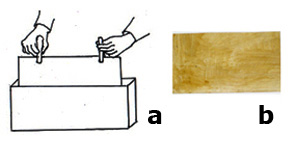 1) With wax: This is the classic method, dipping the paper into wax. Fill up a rectangular shaped tin, big enough to hang a whole piece of paper horizontally, with liquid wax. Hold the paper at both top corners with a pair of tweezers or clothes pegs. Put it straight down into the tin until covered by the liquid wax. Take it out and hang it up to dry. If this is done two or three times it will give the paper a stronger resistance. Once dried the pieces of paper can be piled on top of each other, but on a flat surface and weighed down.
a) Dipping paper into wax. b) Paper prepared with wax.
2) With varnish: Buy a strong, good quality paper and with a big brush paint it on both sides with an ordinary colorless furniture varnish, then hang it up to dry, this should be done two or three times.
3) Plastic pages used in files, buy them in a light color so you can see what you are doing.
With the first two method the problem is that although they have been prepared with wax or varnish if used many times they get damp and have to be left to dry, so to continue working you must have two or three of each one. Plastic, however, is easy to clean and dry, just wipe it with a cloth and go on working.
Method of working with modern equipment:
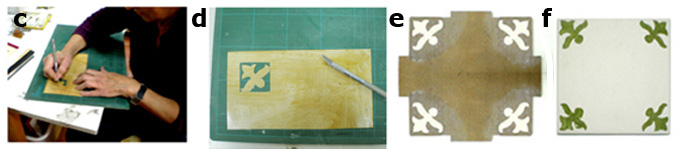
Photo or scan the tile you have to use and make it the exact size. Draw the outlines of the tile. Work out how many you will need, these design needs seven, one for every color and two for light blue. Copy it seven times, one for each stencil, decide on the color you want to use and remove all the others, then mark it with its name, number and color. Print each one onto a page of clear plastic file paper. Using a cutting pad and a very sharp, fine, razor knife cut out the parts to be stenciled.
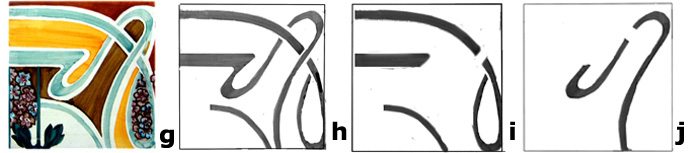
g) The tile stenciled and fired
h) All the colors except the light blue removed. The blue has to be separated into two stencils (i & j)
i) Blue stencil 1
j) Blue stencil 2
Remember:
1) The ink printed on plastic paper does not dry but as this part has to be cut out it does not matter.
2) If a part cut out is large or if it is shaped like half a circle, in order to hold it in place bridge, that is a small piece of the paper, is left connecting the opposite sides. The space will have to be painted by hand after the stenciling of the color is finished.
3) Paint on plastic paper dries very quickly, remove it with a dry cloth and continue your work.
Note: Stencil has 6 sections, to go to the next click on Stencil: (3a) Preparing the paper and if you go to the letter “S” you can see them all together.
