ca:
GERROS - Tornejats en ceràmica.
es:
JARRONES - Torneados en cerámica.
Click on the title to see more images
 Turning a jar: Once the clay has been centered and coned into the basic shape needed, place your fingers round the outside and thumbs on the top and press them downwards to open and widen the mouth leaving the foot about 2cm. in thickness.
When the center is opened make it taller and wider with one hand supporting it on the outside against the pressure from the other inside. Repeat this movement as many times as needed to stretch the clay as much as possible maintaining the shape of a cylinder.
To make this spherical shape, push the inside out with the pressure from one hand and with the other, control from the outside forming the shape you desire, leaving it narrower at the top for the neck.
The neck can be cut down with a saw blade to the height required, then with a kidney of metal or wood level and smooth off the outside, remove all the marks left by the fingers and any excessive slip. Finally with a cutting wire separate the jar from the wheel.
The following photos go through the process of throwing a jar and they are Núria Pié working in her studio. Link to author – Nuria Pié
Note: These are links to all the sections on throwing in alphabetical order.
Bowl Throwing / Cylinder Throwing / Jars Throwing / Lids (c) Throwing / Lids (d) Throwing Cones / Lids Knobs (f) Attached / Plate Throwing / Stack – Throwing / Teapot (a) Body / Throwing – with a tube
 Jar mills are for grinding minerals, oxides, glazes, colors, etc. It is a round, porcelain tub, which can have a door or lid that must be watertight when closed. The jar holds pebbles or prepared ceramic balls, the materials to be ground and water, leaving enough space for the pebbles to fall continuously on to the products being ground when the jar rotates. There are many types and makes and at one time, when a potter had to prepare everything himself, they were a must, but now they are mainly used industrially.
 Turning a jar: Once the clay has been centered and coned into the basic shape needed, place your fingers round the outside and thumbs on the top and press them downwards to open and widen the mouth leaving the foot about 2cm. in thickness.
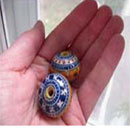
  Beads can be made of different products, valuable stones, metal, wood or anything round you can bore a hole through. Ceramic beads have been developed through thousands of years and have been used in many different ways, body decoration and methods for calculating and also for religious prayers. They are made in clay, fired and decorated using different methods. A bead is usually round, but can be any shape on the outside and always has a hole through the middle big enough to pass a cord through the center, so it can be hung up.
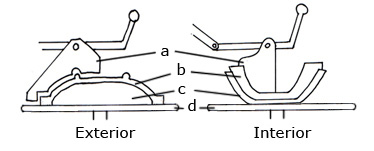
 a) Template. b) Clay. c) Mold. d) Wheel
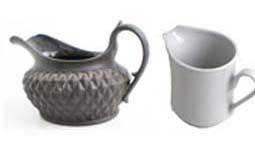
  Jugs are utensils to hold, carry and pour liquid and can be made of different materials. They always have a lip to direct the liquid while pouring it out. Usually the lip and the handle are in line and on opposite sides, but they can be at 90º to each other. A jug can also be without a handle and is then held by the neck or the main body. To make a jug by turning is basically the same as a vase but it has a lip and can be with or without a handle.
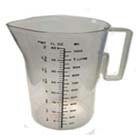
 Jugs for measwuring are industrially made in plastic or glass for measuring different substances, liquids, sugar etc. The height of the weight or the quantity of liquid that a product takes is marked on to the outside of it. In other words if ½ a kilo of sugar fills up 8 cm in the jug, this height is marked onto the jug. It can then be used for measuring quickly and roughly.
