KANNA
ca: KANNA
es: KANNA
Click on the title to see more images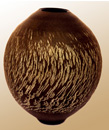 Kanna or tobikanna, Is a Japanese technique. It means “Leap of iron”
It’s a texture that can only be made as the work is turned on the wheel.
It creates an engraved continuous texture on a clay surface. Flexible metal tools are used and are held against the clay as the wheel quickly turns.
It is important to keep the clay in the correct state of moisture; if too soft the tool will enter into the clay too deeply and if too hard it cannot create a continuous pattern.
Working method;
When the piece has been turned and polished, center it again on the wheel. Holding the tool firmly between your fingers and with your arm firmly supported, start turning the wheel, indenting the tip of the tool. When you notice a strong vibration, you are creating a pattern with the Kanna method. Move the tool from the top to the bottom, changing its angle, the speed of the wheel and the pressure on the tool. They all affect the final result.
Since you cannot see the pattern that is being created because of the speed of the wheel, you may sometimes want stop the wheel to check the result. When you stop and restart, the pattern of the incisions changes, the texture is never the same when started again.
Decorative methods;
1) Apply slip over the piece, when it has lost its shine and can be touched without damaging it, put it on the wheel on a chuck and start to apply the tool at the top or bottom, starting gently.
2) Once the decoration on the clay is finished, oxides or slips can be applied into the grooves. When they are dry enough, go over the surface with a knife or very fine metal tool to clean up any roughness.
3) After being fired you can apply a coat of clear, transparent glaze that covers the surface to enhance the effects of the grooves and highlight the texture.
 Tools.
You can make your own tools or purchase them.
The tools must be flexible enough to create the pattern with the movement of the lathe.
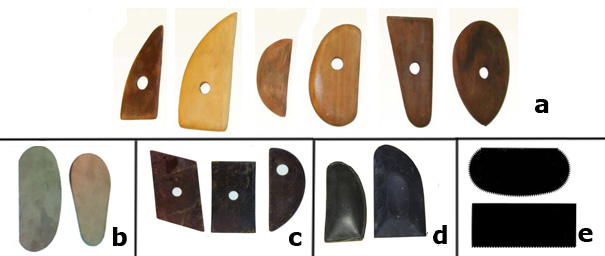
With tin shears and gloves, cut the shapes you need out of scraps of metal or can lids, flexible aluminum or steel, pieces of metal band.
Razor blades also work if one side is cut into a round shape. Cover the opposite side with insulating tape to avoid it being sharp and to be able to put more pressure when making the incisions.
Note: Be careful with the tools, so as to avoid cutting yourself. You must not forget you are decorating with sharp tools and with the wheel turning at maximum speed.
Advice.
It is not an easy decorative technique; it requires time to learn and to master the way to use the wheel and to use the correct tools. When one achieves the desired result, it vibrates like a piece of pottery. Every Kanna piece is different, it is almost impossible to create two identical pieces. The Japanese potter Shiga Shigeo was a great master of this technique.
Photos lent by: Nuria Pié, Shigeo Shiga, Ellen Rijsdorp, Monona Álvarez.
Link to author – Nuria Pié
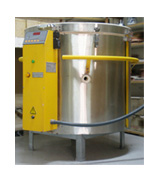
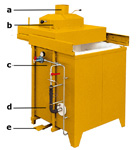 1) Gas kiln: It is square, packed and opened from above. The lid is opened by pressing a pedal with your foot, and pulled outwards horizontally over two guides. It has two burners and the ventilating hood is on top of the kiln with a handle which allows the opening or closing of the entrance of air when firing is being reduced.
  The drawings and photos show and name the different parts of a kiln.
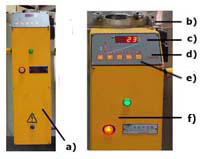 a) The control box.
 a) The peephole.

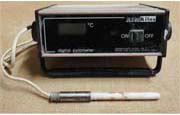 Kiln heat controller is a thermocouple which consists of a porcelain sheath that is passed through the hole at the side of your kiln. The length of the sheath depends on the width of the wall of your kiln. It transfers the temperature of the kiln on to the pyrometer, which interprets it into digits. It can be attached to a temperature controller and depending on its quality, it can completely control the process of firing, from beginning to end.
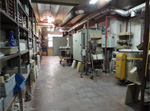 This is a the kiln room: on the left there are shelves full of pieces used in firing and on the right the kilns, boxes to keep the kiln furniture, the work prepared to be fired and the boards they are kept on. The last two photos show a kiln being packed; a side view showing the kiln door and a front one, how it is being packed.
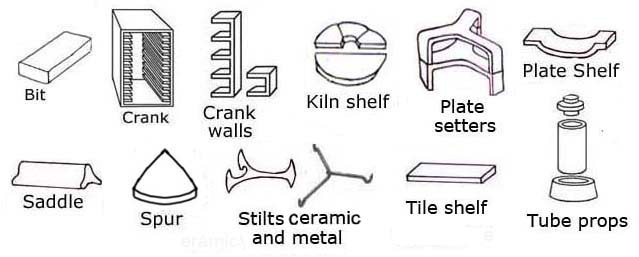
  Kiln Shelves: there are many types, makes, shapes and sizes and their purpose is to make floors. Tube props are built up to the height required and the shelves are put on top. This allows work to be supported at different heights. Note: They are known as bats.
 Kiln test colors: Small kilns for testing colors are useful if you make up your own colors, but they do have problems because as they are small, the heat rises quicker than a normal kiln and I find this alters the colors slightly. This kiln takes bits of bisque 5 cm wide by 15 cm long. Mark them on the back with a code; lay them on top of another piece of bisque which is used as a tray and is slightly larger to protect the kiln, should the colors run. Firing up to 1000º C takes 50 minutes. The box behind the kiln is a transformer as it was made to use with a weaker electrical current 110 volts. This shows you how old it is. Now all Europe has basically the same voltage, 220V. This sufficient for what I need but now you can buy very good industrially made ones.
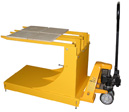 Kiln Trolleys, there are two types:
 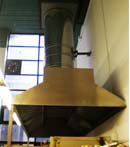 Ventilation for an electric kiln for small workshops is made through two peepholes in the wall and one vent hole in the lid. The vapors escape through the holes during the first stage of firing and these are closed with plugs when the firing of clay and enamels reaches the temperature of around 600° C. This helps to conserve energy until the kiln arrives at the final temperature and during this period no fumes or odors are released. Electric kilns can be without ventilation, ones that are packed from above do not have vent holes like the ones that open at the front nor do they have chimneys as electric firing produces little contamination.
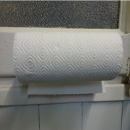 Kitchen Paper; is very useful for cleaning many things, as it is always dry and clean and can be thrown away. I use it when working with very light colors as the cloths you normally use get very dirty and a small dark mark on a place, like a face can spoil the whole picture. It is also used for cleaning silk screens. When the screen you are using is correctly placed it can get blocked with paint and you have to clean it but do not want to dismount it. The best solution is a bowl of water and a roll of kitchen paper.
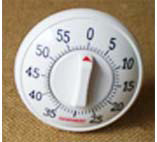 Kitchen timer is like a clock that can be set to ring when a certain period of time has passed. I have a small kiln for firing trial colors which has no time control and for this it is excellent.
 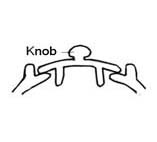 Knob: the name for a small protruding part at the top of a lid or on the side of a basin or vase which is held when picking the piece up. It is a small handle and can be constructed as part of a lid or added later. In the case of a jar, is always added.